


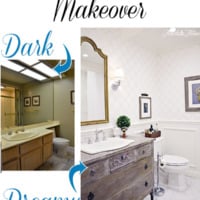
Just after Thanksgiving, I started on a major home improvement project – remodeling the downstairs guest bathroom! If you didn’t see the start of the project, you can catch up {here}. While the handyman completed construction before Christmas, I hadn’t yet shared the final result with you because I wasn’t quite done decorating. But I am now and can’t wait to show you how it turned out! Are you ready for an amazing bathroom remodel with BEFORE and AFTER pictures?
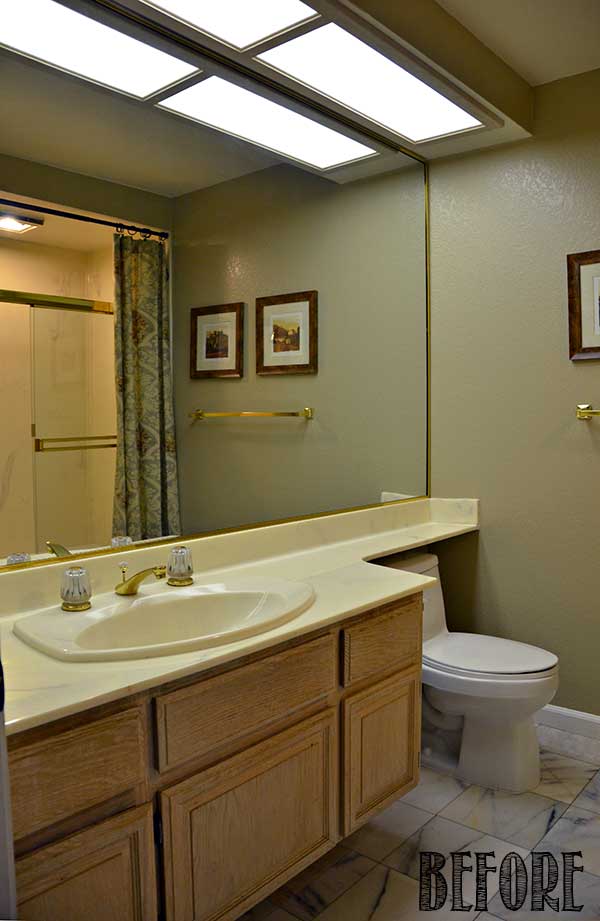
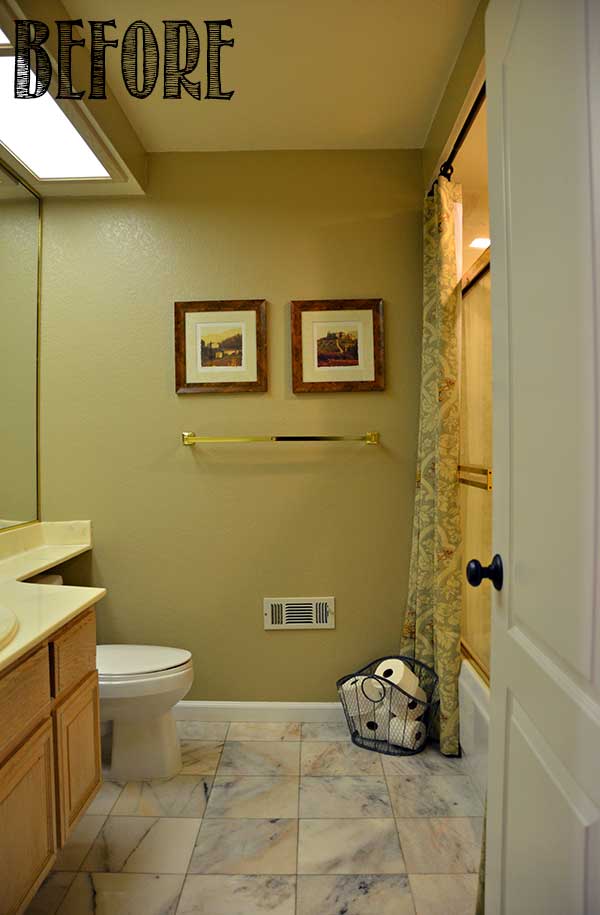
1980’s Bathroom Before
You might recall, the bathroom started out as a builder-grade creation straight out of the ’80s, complete with cultured marble countertops and shower walls, brass everything, fluorescent lighting, and a mismatched patched flooring.
My inspiration piece was an old dresser that I found at the antique fair that I wanted to use as a vanity. The overall look that I wanted to achieve was a mixture of warm and cool tones paired with contemporary finishes and antique accents.
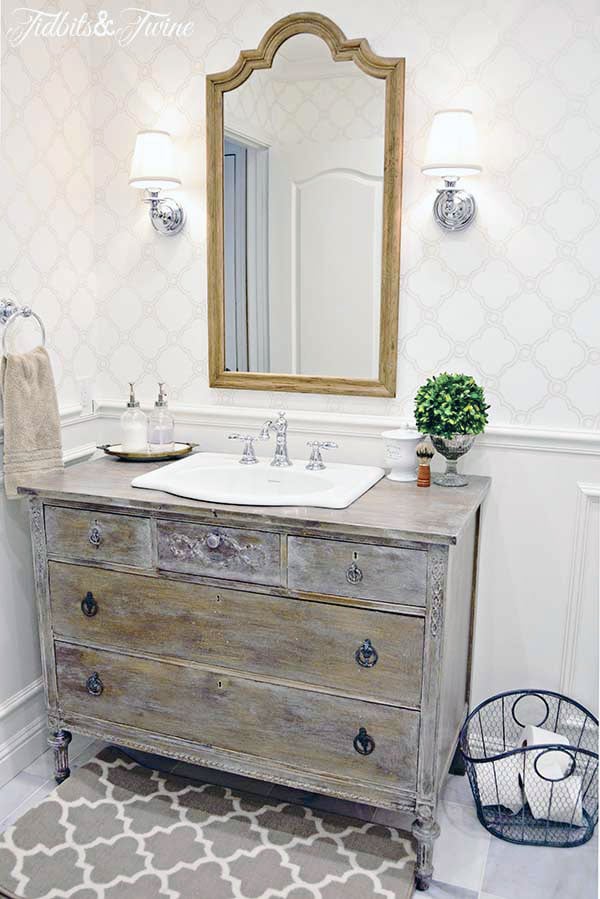
Bathroom Remodel AFTER
Here’s what it looks like now!
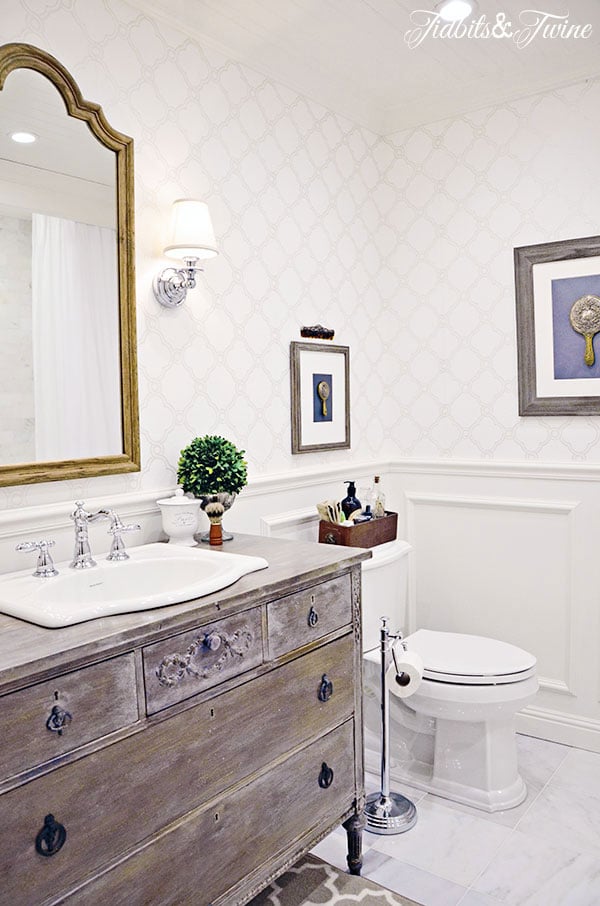
It is *so* much brighter and as a result, feels so much bigger! We removed the old vanity and countertop, along with the wall mirror, fluorescent lighting soffit, and toilet. The new vanity isn’t quite as long as the old but actually offers more storage since it’s a bit taller and the drawers are deep.
Antique Dresser as a Vanity
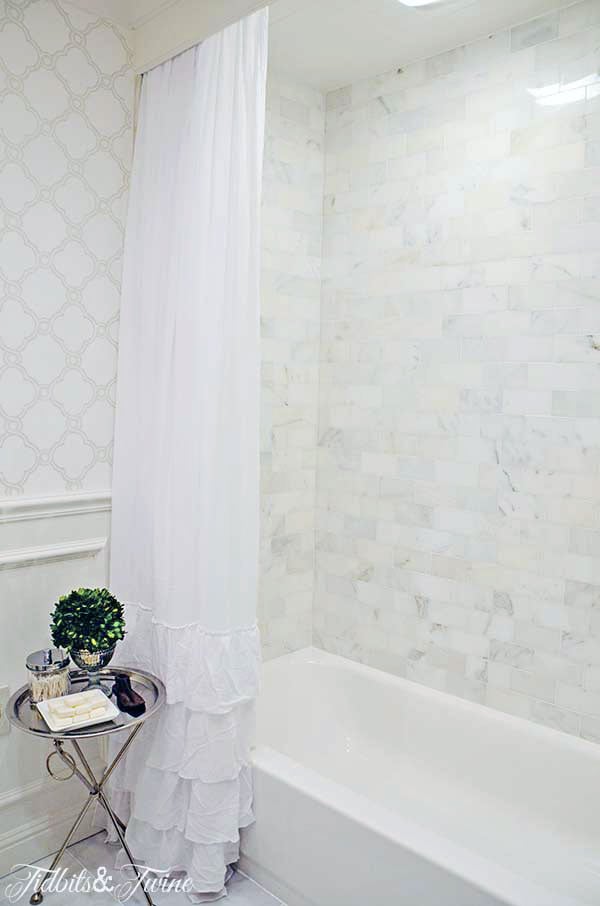
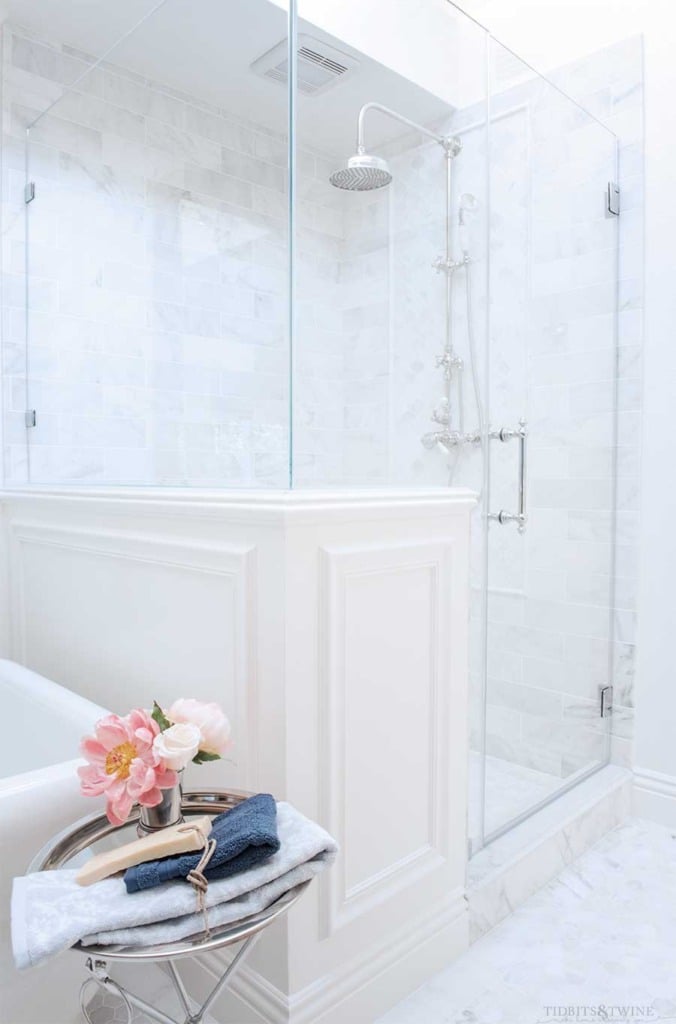
The old floor was replaced with 12×12 marble and we added matching subway tile in the shower. I also asked my handyman to add a decorative panel that drops down from the crown moulding to hide the shower curtain tension rod.
Marble Subway Tile in Tub/Shower Combo
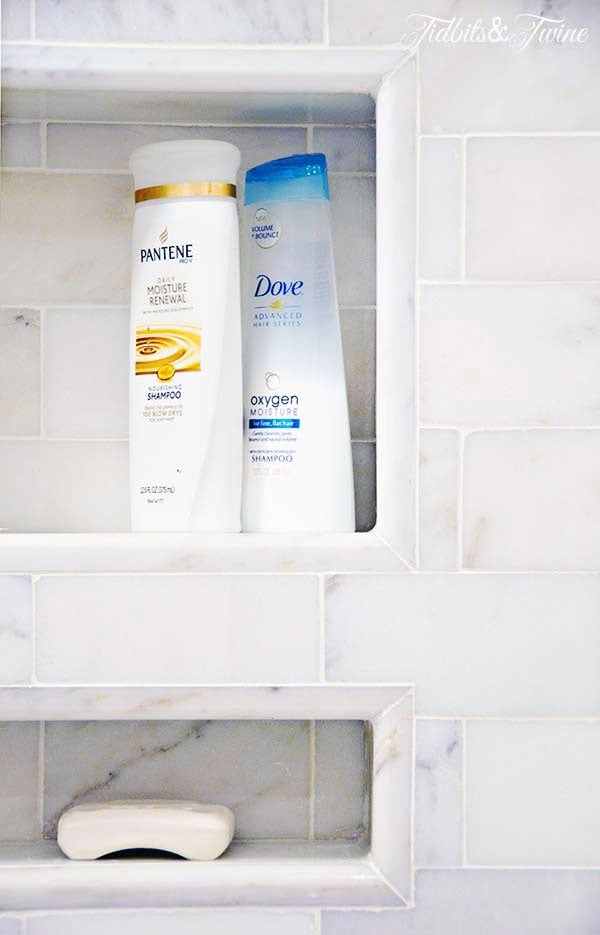
Inside the shower there is a shampoo and soap recess and while it took forever to figure out how to align it properly with the wall, I love the end result.
Shower Shampoo Niche
The shower curtain itself hides behind this decorative, ruffled panel. The panel is actually an 84″ curtain panel that my mom lengthened for me over the holidays.
DIY Ruffle Shower Curtain Panel
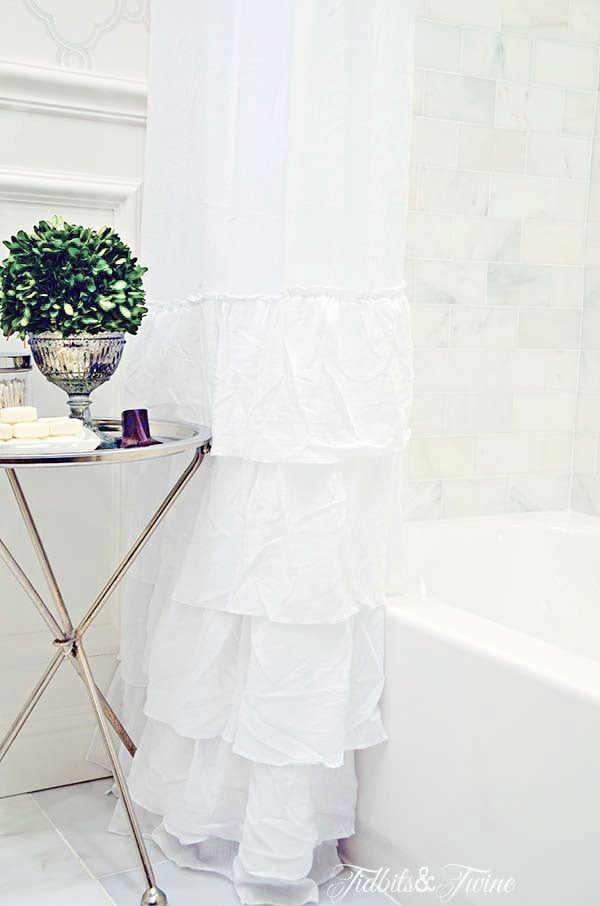
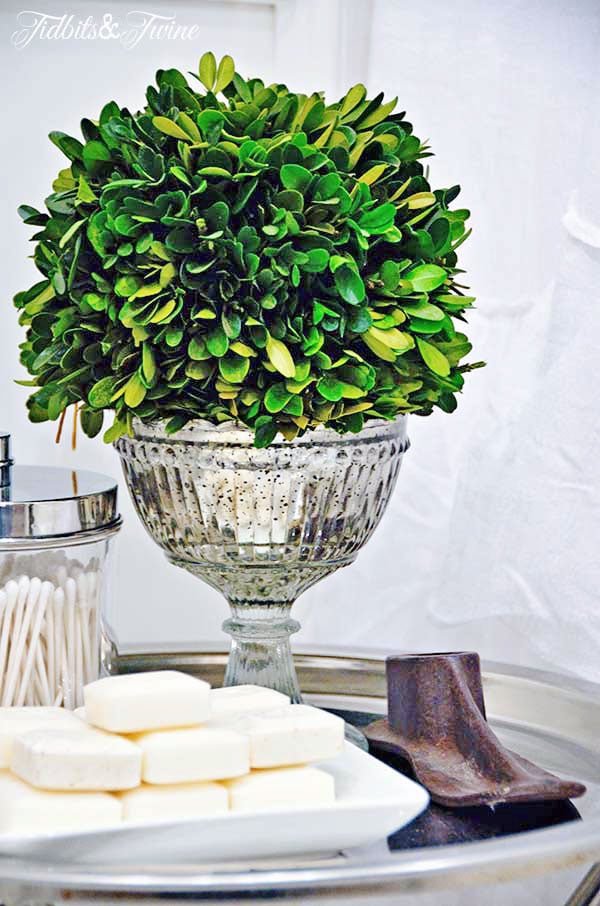
Next to it is a small table that holds extra soaps and Q-tips, but all of that decor can easily be moved and stored in the vanity if guests would prefer to keep extra towels or a change of clothes on the table.
Silver Butler Tray Bathroom Decor
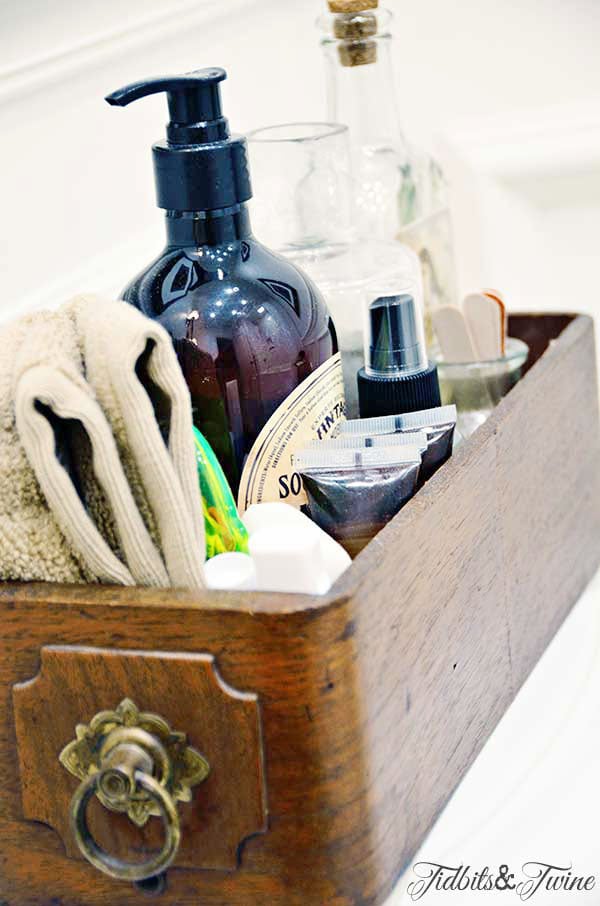
I have even more spare toiletries in a vintage sewing drawer on the back of the toilet. The drawer holds a wash cloth, extra hand soap, travel sized shampoo and conditioner, room spray, nail files, and even a small sewing kit.
Guest Bathroom Essentials in a Sewing Drawer
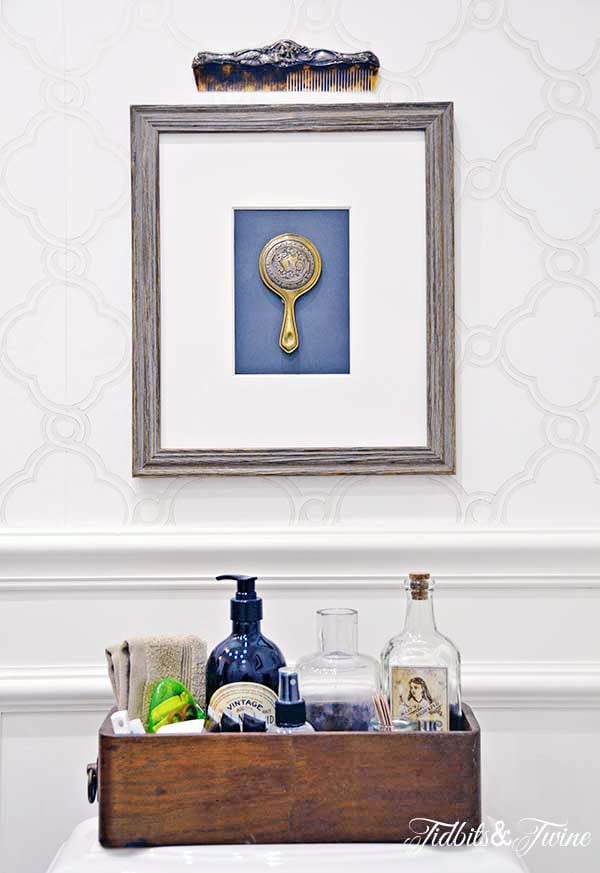
Above the toilet is a small vintage hand mirror and compact that I have framed and placed a vintage comb from the late 1800’s above.
Bathroom Decor Ideas
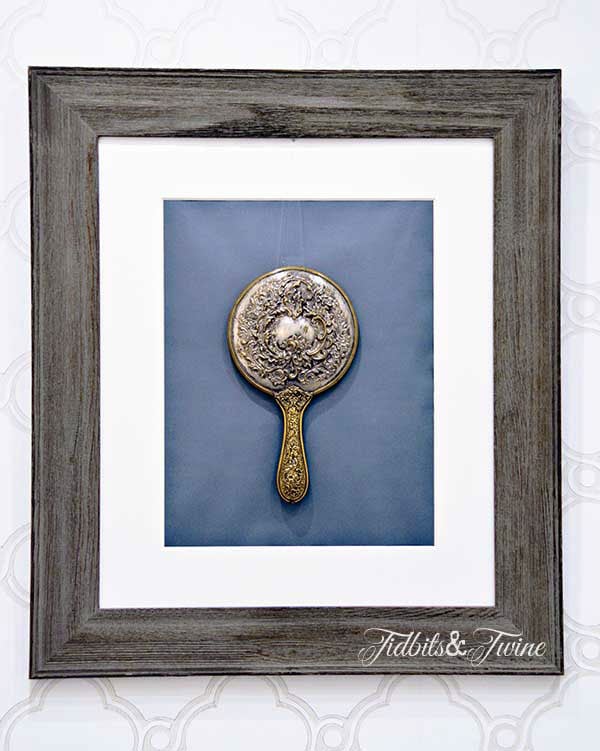
The wall art on the back wall is a large gold and silver vintage hand mirror and I love the juxtaposition of it against the bright, contemporary wallpaper.
The vanity itself is still my favorite part.
Turn a Dresser into a Vanity!
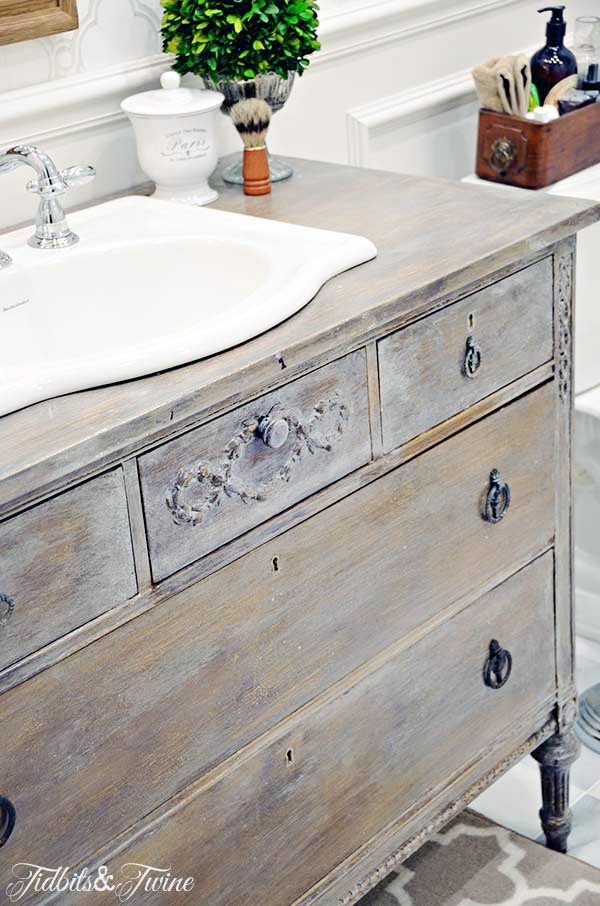
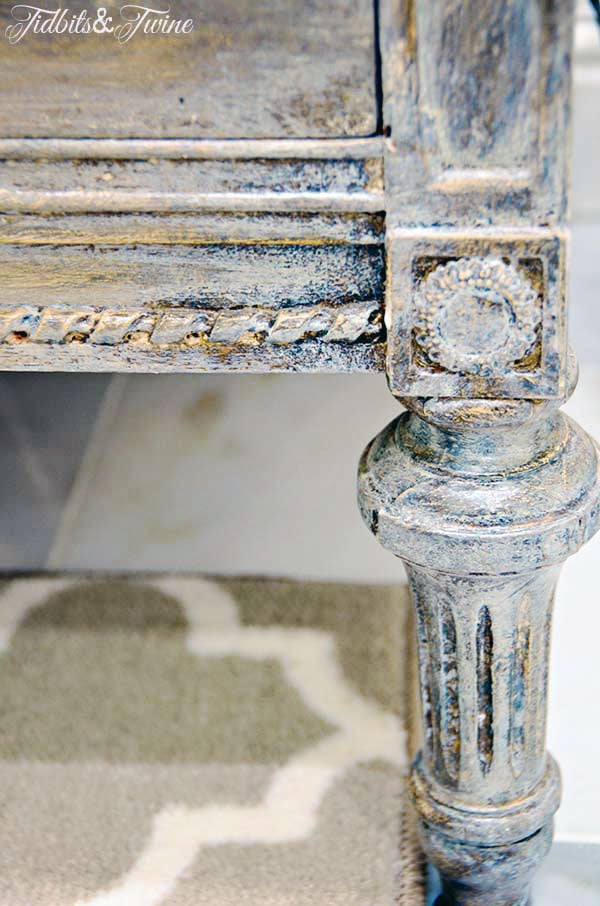
I love that the paint looks like a warm, weathered patina with its mix of warm and cool tones and I love all of the carved details.
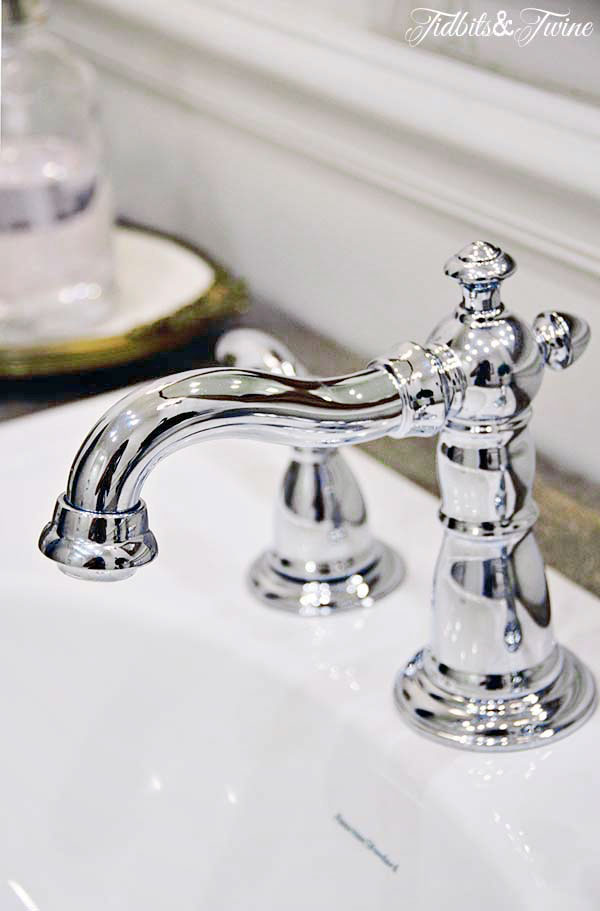
The old faucet was replaced with this vintage-inspired one.
Vintage Style Faucet
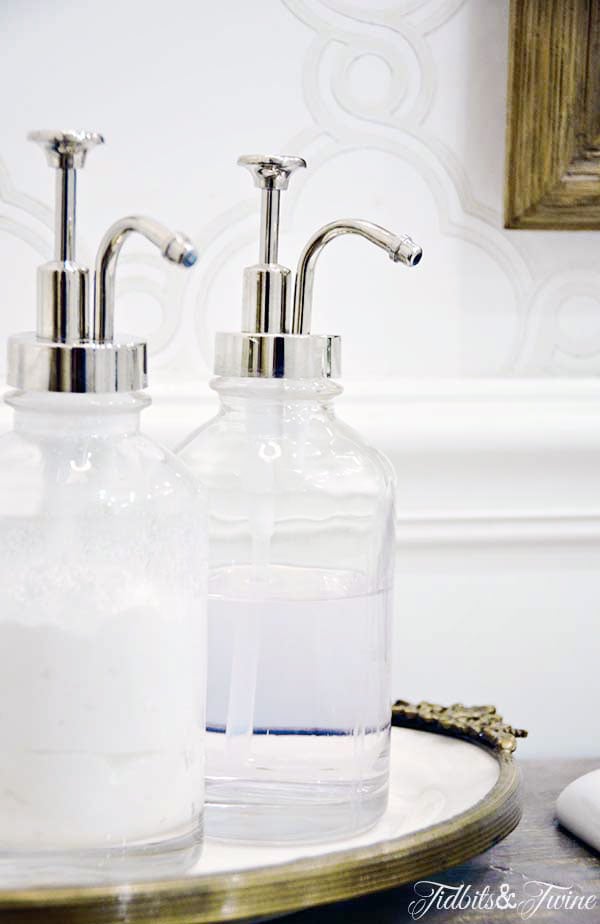
Separate soap and lotion dispenser sit on a small tray on one side…
Beautiful Vintage Style Soap Dispensers
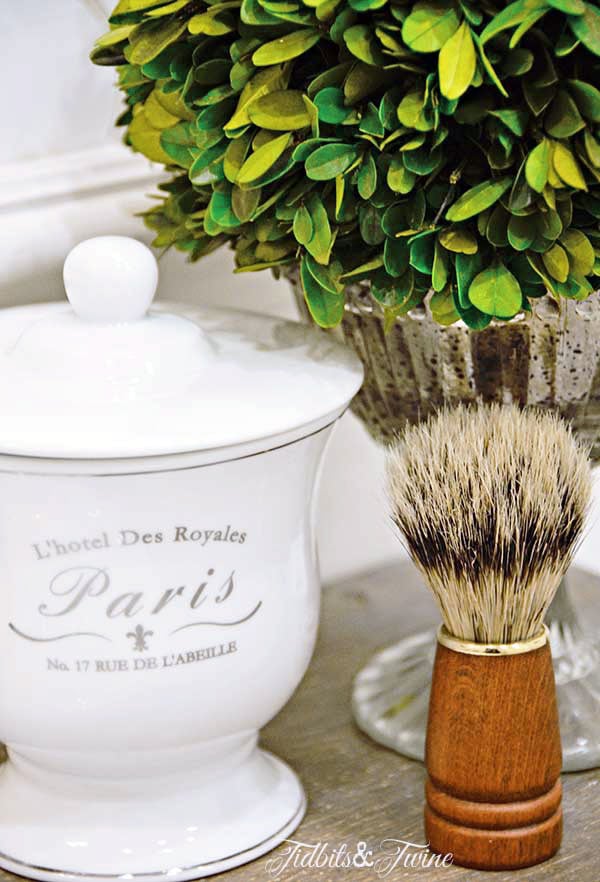
…while a boxwood sphere in a mercury compote dish sits on the other along with a small container that can be used to hold guest items such as tooth brushes, toothpaste, jewelry, watches, etc.
Cute Bathroom Decor
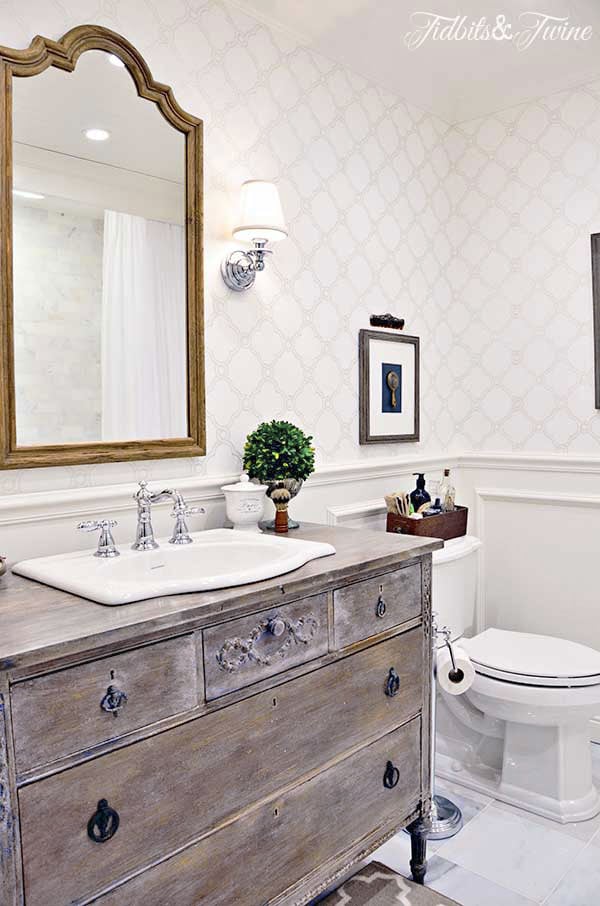
Above the vanity, two sconces offer additional lighting. The sconces are on a separate switch from the overhead lights and the overhead lights are on a dimmer, so all of the lighting can be customized to each person’s comfort level. The mirror is actually the front of what used to be a medicine cabinet. I love that its shape repeats the pattern in the wallpaper.
Sconces Flanking a Mirror
From builder-grade…
…to beautiful!
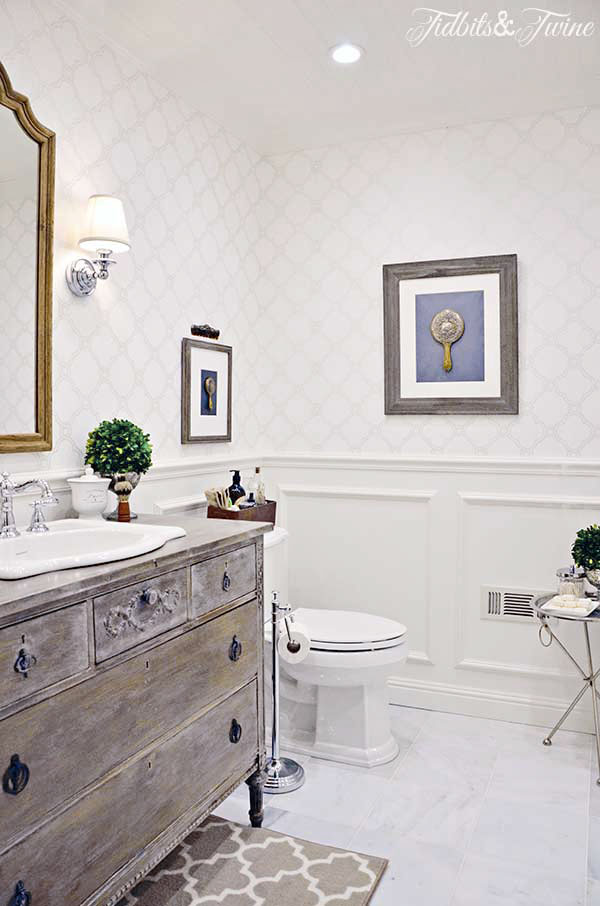
It is so nice to have a bathroom where the sink doesn’t drip, the toilet doesn’t leak, and the shower actually works! This is now our favorite room in the house and I couldn’t be happier with how it turned out!
For a full list of sources, please click {here}.

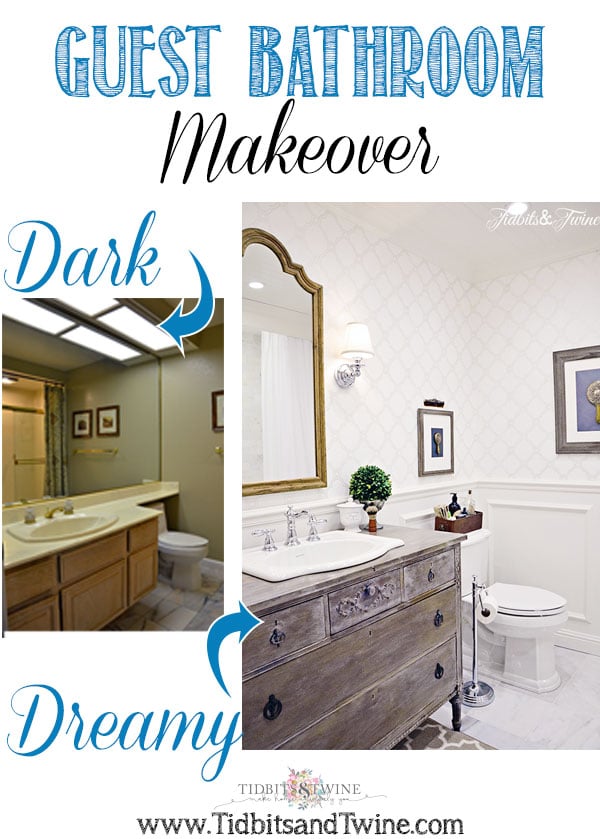
*******
Want to see another bathroom remodel? Click see how our master bathroom turned out!
Absolutely beautiful. It looks lovely it’s from a high end bed and breakfast. The transformation is incredible.
I am using an old dresser for a vanity too. I notice your’s doesn’t have a backsplash to it either. What did you use to seal the top against water and the backsplash area?
Looks beautiful!
Hi Jan!
I wish I remembered the exact brand that I used, but it was a water-based topcoat and I applied three coats. The backsplash is wood, not MDF, and it just has regular semi-gloss paint. This is a guest bathroom so it doesn’t get a lot of use.
Good luck with your remodel!
:) Kim
Like most of us here I’m sure I’ve seen hundreds of makeovers, but YOURS! It just takes the cake in every way! Complete jaw dropper stunning! The vanity is the heart & soul of the room for sure, but you put just as much thought into every detail so that the entire room really supports such a beautiful piece! Every part of the makeover makes every other part just that much more beautiful. (Can you tell I’m in love w/ your bathroom?! Lol. Just a bit!)
Really awesome job! And the descriptions were so great as well!
Beautiful & one I’ll come back to for inspiration!
Very clean looking bathroom, you did a great job. thanks for sharing with us.
you really did a beautiful job! I love how bright & fresh everything looks. What an improvement.
Wow! What a stunning bathroom. you did a great job!
How do I get the color of the vanity? I love it. Is it a certain stain or several different colors? Love love love
I just love the way your bathroom renovation turned out!!! I’m about to start the same project with an antique dresser I found recently. I would love to know what you used to get that finish on your dresser? Thanks!
Beautiful! I’m in the process of remodeling my bathroom and have a dresser I plan to turn into a vanity also. If you don’t mind me asking, how tall is your dresser? I was reading about the typical height for a bathroom vanity falls between 30″-34″ where 35-36″ are okay but usually on the high side. And did you do anything to resurface or varnish the top? I’ve read a few blogs who have also re-purposed a dresser and there is a large range of what people do. Thanks!
PLEASE tell me where I can purchase that or like vanity !! I LOVE IT
Love the bathroom!!!! Amazing..
How did you stencil the wall? Looking to do something similar
Thank :)
Hi Mayra – I didn’t stencil it, I wallpapered it. I debated for a long time about doing so, but since it is a neutral wallpaper I decided to go for it! :)
Hi Kim,
I just curated a board for Hometalk of my favorite guest bathroom redo’s and wanted to let you know I am featuring yours. You can check it out if you’d like: http://www.vintagerefined.com/blog/2015/6/8/bathroom-makeovers. It will go out tomorrow.
Thanks!
Hi Ashley,
Thank you *so* much for including my guest bathroom in your board and blog post! I’m thrilled!! :) Kim
Kim – This bathroom is so so beautiful! I can’t believe the difference! You have amazing style! Pinned for inspiration!
Cat
Hi Cat – Thank you so much!!! :) Kim
Kim,
This is just beautiful! The vanity is so special, and I also love your little details. The framed hand mirror and using the vanity pieces as art is quite wonderful. Beautiful marble and lovely shower curtain panel. Love it all!!
Lory
Hi Lory – Thank you for your kind comments! :) Kim
So in love with this makeover. Absolutely gorgeous!
I should have gone to the source post before asking about the mirrors, so no need to answer. Thanks, Bambi
No worries! Good luck with your project! :) Kim
What an amazing and inspiring transformation. Could you share how you attached the hand mirrors to the backing? I collect them and would love to display a couple of them in that manner.
Thanks!
Love everything about this space! Gorgeous. Did you share your source for the side table in another post perchance? Also, would you please PLEASE please give a tutorial on how you transformed the dresser top into a sink? That’s a project I’ve been dying to try and I have the piece ready and waiting! Thanks!
Hi Sara! Thank you so much! I shared all of the sources in a separate post that you can find here: https://www.tidbitsandtwine.com/guest-bathroom-details-sources/. I haven’t yet done a tutorial for turning the dresser into a vanity but surprisingly, it wasn’t as difficult as I thought it would be. The basic idea, though, was to take the sink template and lay it on top of the dresser top. We used a chalk pen to trace the outline. We DID NOT center the sink but rather put it slightly more toward the front so that you don’t have to reach or lean in order to wash your hands. The handyman used a jigsaw to cut around the chalk line and once he dropped the sink in, he sealed it with caulking. In the Source post I provided above, you can see a picture of the inside of one of the drawers to see the U-shape that we added so that the drawers were still functional. Keep in mind that my dresser had the drawer glides on the sides, not the middle, which allowed us to cut out a portion of the center.
Good luck with your project and I’m sure it will turn out beautifully! :) Kim
Love, love, love your bathroom transformation! We are downsizing and permanently moving into our vacation home this summer. I plan to redo the dated bathroom that is similar to your ‘before’ BR. How did you remove the old track and glass slider on your bathtub? Did you have to have the tub refinished? Thank you?
This bathroom is just beautiful. Job well done! Did you buy the dresser like this or did you paint it?
omg! Drooling over here! What an amazing transformation! Love every detail in the room but that vanity! Oh my! Soooooo beautiful!!!
Absolutely gorgeous! We’re in the planning stages of remodeling a small bathroom, and I have an antique washstand that we’re going to use as a vanity. It keep going back and forth between putting the sink right in the top of it, or topping with with stone. I love the look of your vanity, so you might have just swayed my decision. I made sure to pin your post and am now following you!
Absolutely gorgeous and inspiring! I can’t wait to get my hands on a couple of our bathrooms in our home. I would love to hear how you got your dresser to have the patina look and vintage.
Gorgeous! Thanks for the inspiration!
Wow….this is just BEAUTIFUL…love it!
Thank you, Tammy!
I love the vanity! Perfect finish. Visiting from Savvy Southern Style.
Melissa
Thank you so much, Melissa!
Love your bathroom and the vanity! I did the same thing with a buffet in my guest bathroom!
Ooooohhh….a buffet wold make an amazing vanity, too! I’ll bet it’s beautiful!
Outstanding! Will share the name of the wallpaper, faucets, and sconces?
Hi Ingrid – Sure! You can find the names and links to everything {here}.
Wow, what an amazing transformation. I especially love the dresser you used as the vanity. It has such a great patina on it.
This is a very inspiring and amazing transformation. I love the shape of the sink as well as the dresser you used as a vanity.
What a fabulous makeover. Love your mix of decorative accessories too! Lovely!
Kim! This is stunning!! That vanity is perfection!! Thank you for sharing. You are one of the fan favorites at the Sunday Showcase from the Make it Pretty Monday party at The Dedicated House. Here is the link to the Showcase so you can check out your feature. http://www.thededicatedhouse.com/2015/02/sunday-showcase-from-make-it-pretty.html Hope to see you again tomorrow at the bash! Toodles, Kathryn @TheDedicatedHouse
WOW, Kim!!!! You did such an amazing job creating this gorgeous space for your guests!! So much to love…the vanity, vintage drawer, panel to cover the shower rod, perfect touches from top to bottom! Thanks for sharing at Best of the Nest!
Hi Pam! Thank you so much for your kind words! And thanks for hosting such a fun monthly party! :) Kim
I am in absolute adoration of that dresser turned vanity.Did you purchase it with that finish already in place or did you stain/paint it to get that effect?.I am in awe…that finish is what I have been wanting to create. I NEED a tutorial…please? Love the wallpaper also! :)
Hi Shelley – I *wish* I could provide a tutorial but I bought it that way! I was told that it’s painted and I think she said she used three different colors.
OH. MY. GOSH! Kim, you did an amazing job with this gorgeous bathroom, WOW!
Love every element, you really did well, love it love it love it!
Hi Michele – Thank you so much!!!! :) Kim
Oh my gosh – what a beautiful bathroom!! I love all your choices, the tile, wallpaper and finishes are all gorgeous, especially with a bit of wood for warmth!
Hi Lisa – Thank you! Thank you!!! :) Kim
Oh.my.word. This is everything I dream of! I LOVE the vanity! Everything is beautiful!
Thank you so much, Amber!!
Your bathroom turned out stunning, Kim! I am in the midst of our master bathroom makeover. Nothing as major as yours was, but enough to make a real difference in its look for not a lot of money. I’m waiting on a cabinet and then it will be done and I can’t wait! I love the piece you used for the vanity and the tile is gorgeous. You really turned this bathroom into a light, bright and elegant space.
Hi Kathy – Making over the master bath is a super exciting project! How fun! I’ll be you’ll be relieved when the cabinet arrives and you can really see the difference you’ve made. I’m sure it will turn out beautifully! :) Kim
This looks amazing! I’m about to be in the middle of a reno myself. I apologize if I missed it, but could you maybe name your sources for the tile in the shower and on the floor?
Again, love what you did with this space!
Hi Lianna – Thank you! I actually posted links to all of the sources today. You can find details about the tile here: https://www.tidbitsandtwine.com/guest-bathroom-details-sources/ Good luck with your reno!! :) Kim
Gorgeous! Beautifully done and inviting!
Nancy
wildoakdesigns.blogspot.com
Thank you, Nancy!
Beautifully done! Bravo!
Thank you!
This is stunning! I love every detail. Sharing on my FB page ;)
Hugs,
Jamie
Hi Jamie – Thank you so much for your kind comments and for sharing on your FB page! I really appreciate it! :) Kim
Kim, this is beautiful! I love the dresser turned vanity. I would love to have that in a bathroom.
Hi Kim! Thank you so much! :) Kim
Gorgeous! What a fantastic transformation! All of your little touches are fantastic also…I can see why this is your favorite room in the house!
Hi Julie! Thank you so much for your kind comments! :) Kim
What a gorgeous makeover! I love all the choices you took to transform this bathroom, and I’m with you, my favorite is the vanity, beautiful!
Hi Cristina – Thank you so much much! :) Kim
It turned out absolutely beautiful. Love the dresser turned vanity! I so want to do this..Just have to find the right piece. Thanks for the inspiration! I can see why y’all live it!
Hi Cecilia! Thank you so much! We weren’t even planning to redo the bathroom when I found the dresser but once I saw it, I just *had* to have it. :) I hope you find the one you’re looking for! -Kim
Oh my goodness, that is beautiful!!
Hi Stacey! Thank you so much!
Gorgeous! Amazing transformation.
Thank you, Korrie!
Elegant and lovely. What a charmer.
Thank you, Susan!
Holy Cow Kim! That is beautiful. And I think we had the same builder.. since we had the same “before” bathrooms.. My favorite was the “Cryst-all” faucet handles!
Your after is beautiful!
Hi Kim! Thank you so much! I definitely don’t miss those faucet handles! I have the same ones in my master bath and I’m itching to replace them….someday I hope! :) Kim
My favorite is definitely the vanity – beautiful! Clever idea of hiding the shower curtain rod too!
Thank you so much! Not seeing the curtain rod is nice and helps to give everything a more seamless look, especially since I never got around to buying a chrome one and I’m still using an oil-rubbed bronze rod that doesn’t match anything in the bathroom. Sssshhhh….don’t tell! :) Kim
I had to go through the comments to see if you said how you put up a regular curtain panel for a shower curtain. This is as close as I found! Did you use two rods, one for a liner, one for a curtain? or did you somehow get the curtain on the shower hooks? HOW did you do this pray tell? It is an amazing room!
Hi Joanne!
I only used the curtain as a stationary panel, so it’s purely decorative and is attached to the wooden panel above the tub. I have one shower curtain and it’s white and on a rod and tucks behind the decorative curtain when not in use. I hope that clarifies it for you!
:) Kim
No edit button. Frugal Frau’s Mansion Makeover. ( our homes are OUR mansion).
You need a TV show – The Dollar-Wise Decorator. The Frugal Frau’s My Mandion Makeover. The Dump Decorater. Makeover My Manse. K. Enuf. I want to know why you didn’t go with the sconces uou originally chose. They had crystals so byooty-full. Ones you have are certainly nice but I do love the initial one you chose. K. What is the next project? Waiting impatiently. Decorating Dreams to you (another TV show name too!)
You are too funny! Love The Dump Decorator! I ended up not buying the crystal sconces because I decided that with the exception of the vanity, I wanted everything else to be a bit more typical for a bathroom and able to transition between styles. Really, I was thinking about resale value and how someone would react if they didn’t like the style I’ve chosen. Since the wall behind the vanity and the floor are completely finished, someone could easily put in a different vanity if they want and everything else works with other styles so I thought it was just a bit more practical. But yes, those original sconces were amazing!!
Kim,
It’s beautiful. What a huge difference. The vanity is great and I love all of the accessories and additions. Congratulations.
Karen
Hi Karen! Thank you so much!! :) Kim
what a fantastic makeover. love the sink in the buffet.
Thank you!!! :) Kim
That’s an amazing transformation!
Thank you so much, Sue!
By the number of comments you are getting, you must know this is a home run! I adore this room and all of it accessories are making me drool. I love the idea of the little table by the bath. Stunning!
Hi Robin – Thank you so much! I have had that little table for years and never really had a home for it so I was thrilled when I realized it could go in the bathroom! :) Kim
Wow! Absolutely gorgeous!
Thank you, Amber!
Stellar! and when other decorators, bloggers, and designers make positive comments, you KNOW you’ve created a winner! Kudos for a magnifique transformation. Gonna steal some of your ideas…the best compliment!
Hi Kathryn! Thank you so much! I am beyond excited by all of the wonderful and supportive comments that I’ve been receiving! I really do read and appreciate each and every one. :) Kim
what a beautiful transformation! You did an excellent job with this guest bathroom. I don’t know how your master bathroom look like, but this is really stunning. Such a luxurious make-over. I love all the tiles you have picked and the cabinet is just to die for! It fits beautifully in this space. Thank you for sharing!
Thank you so much!!! :) Kim
Everything they all said plus wow, wow, wow. Great job.
Thank you, Judy!
What a beautiful makeover!! It really is stunning! So bright and elegant – well done!
xo. Leslie
Segreto Finishes
Hi Leslie – Thank you! I still can’t get over how much brighter the room is!! :)
Every single square inch of this space is absolutely stunning! Seriously magazine-worthy. I’ve seen your blog before sprinkled all over Pinterest and on Facebook but really just dove into it today and WOW! You are a girl after my own heart. Love your style! :)
Hi Lauren – I’m so glad you stopped by for a visit today and appreciate the sweet comments that you left! Thank you!!! :) Kim
It really turned out just gorgeous!! Are your walls stenciled or wallpapered?
Hi – Thank you! The walls are wallpapered. I have textured walls but even so, it came out great. The key was to use a liner underneath. :) I’ll share all of the sources in an upcoming blog post.
Beautiful Lynn!! Agreed, my favourite part is the dresser turned vanity. Have on in our teeny master ensuite.
Thank you! I think the dresser is my favorite part, too! :)
This is an amazing transformation and I am SO jealous! No, really I am happy for you and I can see why it would be a favorite room in the house. I love every detail and you’ve certainly decorated it down to the very LAST one. Pinning for future inspiration.
Bless you,
Patti
Hi Patti – Thank you *so* much for your kind comments! I really appreciate it! :) Kim
This is simply amazing!!! The transformation is beautiful – you have a wonderful talent to imagine how it would all work out with the vanity and the wallpaper to achieve the look you envisioned for this space. I absolutely love it and keep going back & forth between the before & afters because I really am blown away by this remodel!
Hi Liz! Thank you so much!! It’s funny because since I lived through the remodel, I forgot how the Before looked until I went back to grab the photos for the post and even I couldn’t believe the difference! Now, of course, I want to remodel my master bath {because it looks exactly like the guest bath before} but it’s not in the budget… :( I’ll just spend more time in the guest bath for now!! Lol!
SO BEAUTIFUL!
Fabulous, fabulous outcome!
Catherine
Thank you, Catherine!
Just a stunningly gorgeous transformation. You are so talented. I love it all!
Thank you so much!!! :) Kim
Absolutely love it.
Thank you!!
The new bathroom is not as dark as the before picture and the colour scheme really brightens things up! It’s elegant and warm and a room guests would be happy to indulge themselves in. I’ve always wondered if there’s an easy way to apply moulding onto the wall. It really enhances the decor. Valerie
Hi Valerie – I can’t believe how much brighter the new bathroom is either – I love it! The moulding is actually three pieces all applied to the wall using liquid nails. There’s a chair rail at the top, a plain pine board, and a piece of trim that’s been mitered into a square. I was originally going to do a recessed panel, which looks a bit fancier IMHO, but it was more costly and so I just went with the trim applied directly on the pine board. Now I want to put paneling all through the house!!!
Love this transformation! Did you refinish that vanity to that color or did you find it that way? (and if so can you share the finish you used)
Hi – I bought it like that at an antique fair from Belle Maison Designs in San Francisco.
On my, where to start to list what I love about this room? I will just have to say everything! Such a lovely transformation. I am sure you are loving your beautiful new room. Jane
Hi Jane – Thank you so much!!!!!! :) Kim
In love with your vanity
Thank you, Zeina!!
STUNNING!! I love love love your vanity!
Thank you, Martina!
Absolutely stunning. fondly ~lynne~
Hi Lynne – Thank you so much!! :) Kim
Comment
Absolutely stunning! I had to pin some of your photos…just love every detail in this space : )
Thank you, Deb and thanks for pinning!!!
Oh wow, this is stunning!!!! Such a gorgeous bathroom and I adore that vanity also, the perfect piece. Fabulous makeover.
Hi Marty – Thank you!!!!! :) Kim