First off, I wanted to say thank you to everyone for your comments about my bathroom makeover. I am completely overwhelmed by everyone’s kindness! I really do read each comment and am appreciative of them all. Thank you!!

Okay, let’s talk details and sources! I received a lot of questions about the vanity, wallpaper, tile, etc. so I thought I’d address everything here. I’ll first give you information and details {and tips} about each area of the bathroom that generated questions and then I’ve provided a list of sources with links at the bottom of the post.
Wallpaper
I have textured walls and even so, was able to wallpaper because I used a wallpaper liner. Don’t let textured walls stop you from using wallpaper! The liner is key, though. Apply the liner directly to your textured wall either A) horizontally or B) vertically but offset from where you want your wallpaper seams. It is important that your liner seams and wallpaper seams DO NOT match up because if they do, your wallpaper seam will want to pull away from the wall. Allow your liner to dry at least 24 hours before you apply the wallpaper. The finish won’t be as smooth as if you started with smooth walls, but you have to look really closely to notice the texture underneath so the overall look is just fine.
Wainscoting
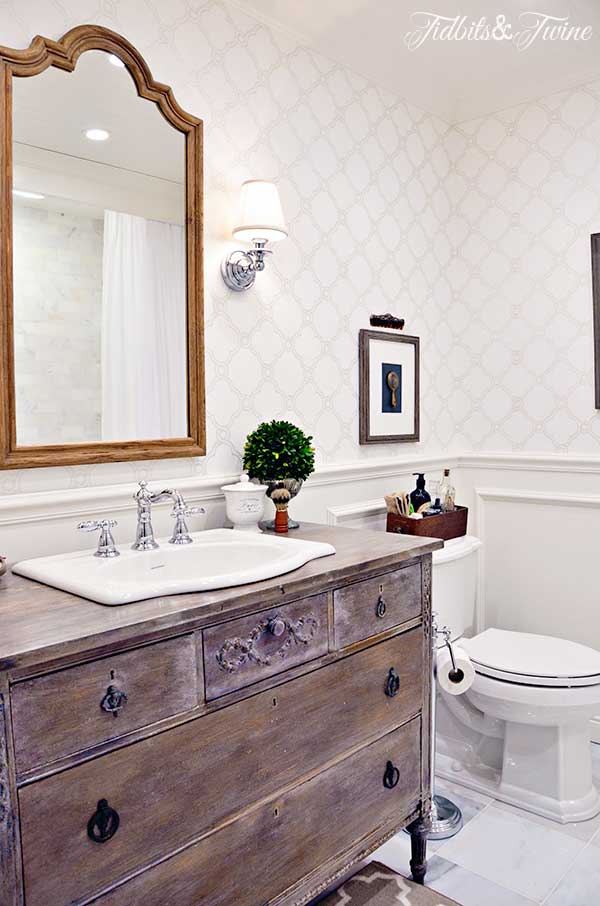
I originally wanted to do a recessed panel, but the expense was cost-prohibitive and so I went with chair rail that sits on top of a pine board that has trim mitered into square shapes. All of the trim is solid wood, which is best for an area like a bathroom {with a shower} that will be exposed to water and moisture. The top of the chair rail is at 41 inches from the floor so that I have 6 inches from the top of my vanity to the top of the chair rail, effectively creating a backsplash for my vanity.
Beadboard Ceiling
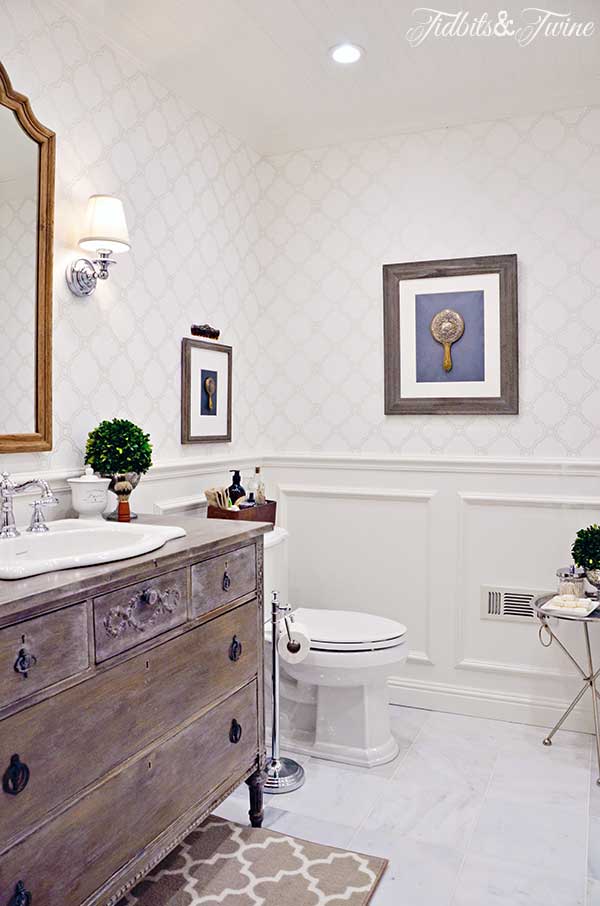
I am absolutely in love with my beadboard ceiling! It is, however, the one item that is MDF in the bathroom, which is a no-no because of the steam created from the shower. To try to prevent moisture from penetrating the beadboard and causing it to warp, I first primed it with a moisture blocking primer and then painted it with semi-gloss paint. All of the joints were then sealed with caulking and painted again.
Vanity
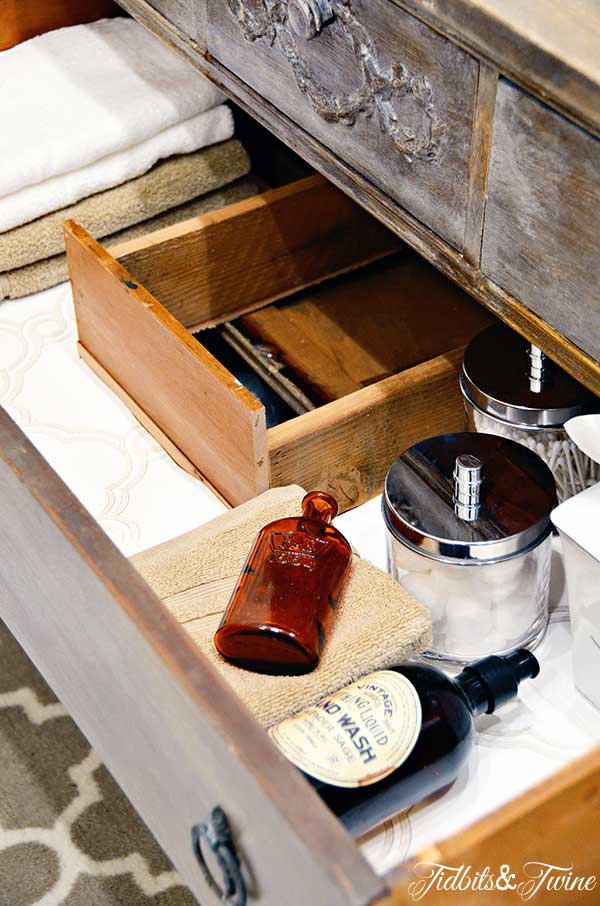
As much as I would love to share the secret to creating the vanity’s finish, it looked like this when I bought it! It started out as an antique dresser and with the help of the handyman, we converted it into a fully functioning vanity with very minimal loss of storage. Only a small U-shape had needed to be cut from the two large drawers at the bottom to accommodate the plumbing and the remainder of the drawers is still usable space!
Wall Art
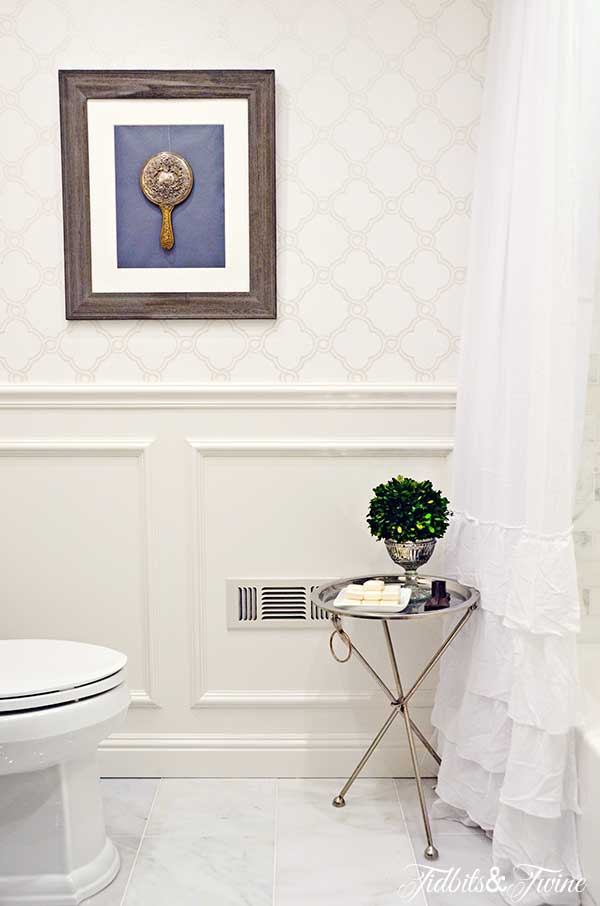
For the wall art, I used framed vintage gold and silver hand mirrors. I simply removed the glass from the frame and first attached the hand mirror to the backing using a sticky command strip so that it would sit flat {you could use any type of heavy duty two-sided sticky tape}. I then wrapped monofilament around the handle and attached the monofilament to the frame using an eyehook so that the mirror was securely supported.
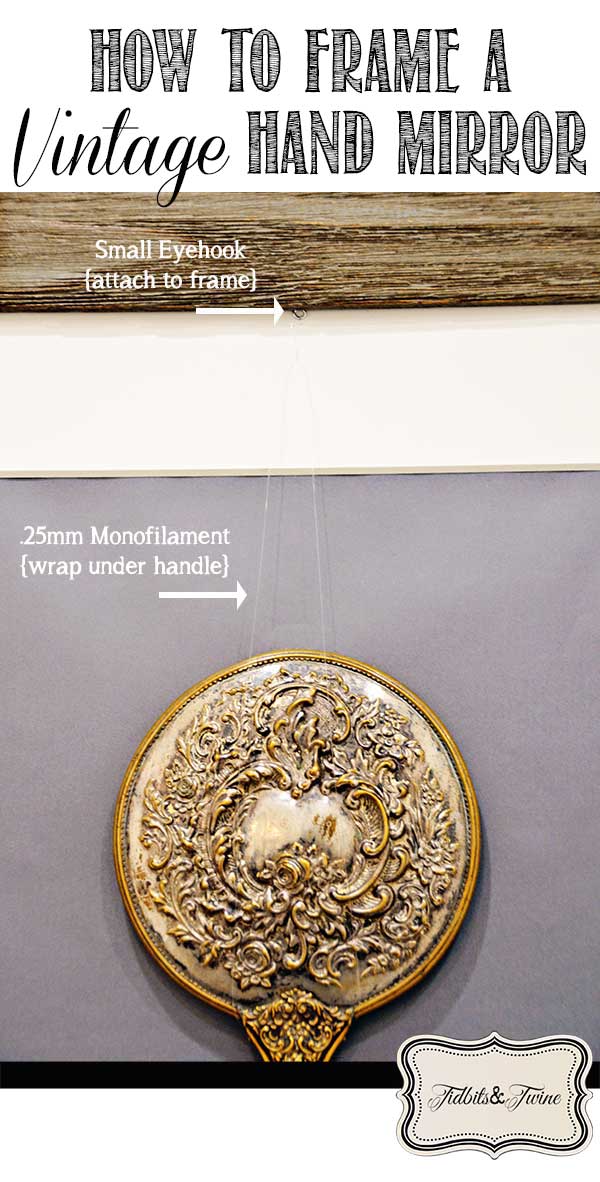
When it was time to actually hand the framed mirror on the wall, I faced a dilemma. I change my mind about decor so often that I didn’t want to do anything permanent and putting a nail through wallpaper would leave a permanent hole! Instead – and despite 3M’s warning – I tried using a Command hook on wallpaper. DO NOT DO THAT! Command strips do not stick to wallpaper and will not hold {I learned that the hard way – oops!}. Eventually, I decided to use my crown moulding as a picture rail and I simply screwed another eyehook into the crown moulding and used the monofilament to hang the frame from the ceiling! It was super easy and is very secure and if I ever decide to change the wall art, I can simply remove the eyehook and patch the hole in the crown.
Tidbits&Twine Bathroom Sources
The products, along with affiliate links, are located below. I’ve listed as many items as I can think of below, but if I’ve missed something, let me know and I’ll add it to the list!
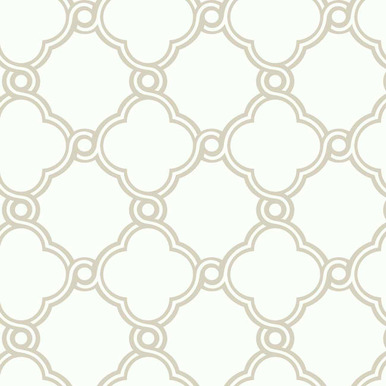
- Wallpaper – York Wallcoverings, Silhouette Collection, Open Trellis in Silver/Taupe and White. I purchased mine from The Fabric Co. but you can also buy it on Amazon. {I highly recommend The Fabric Co. though as they were SUPER helpful and spent a great deal of time on the phone with me helping me learn how to apply wallpaper. A great resource if you’re new to wallpapering!}
- Wallpaper Liner – L-1 Paintable Solid Wall Liner Wallpaper. Available at The Fabric Co.
- Vanity – Purchased from Belle Maison Designs
- Floor Tile – Greecian White 12×12 Polished Marble. Available at Home Depot
- Shower Tile – Greecian White 3×6 Polished Subway Tile. Available at Home Depot
- Tile Molding – Greecian White 3/4 x 12 Polished Pencil Molding. Available at Home Depot
- Sink – American Standard Retrospect from Home Depot or Amazon
- Sink Faucet – Delta Victorian 8in Widespread Faucet in Chrome. Available from Home Depot or Amazon
- Shower Faucet – Delta Victorian 1-Handle Shower and Tub Faucet in Chrome. Available from Home Depot or Amazon
- Toilet – Kohler Devonshire Comfort Height Toilet in White. Available on Amazon
- Paint – Sherwin-Williams Swiss Coffee custom match in semi-gloss {Swiss Coffee is actually a Kelly Moore color, but I prefer Sherwin Williams paint}
- Vanity Mirror – Whitby Medicine Cabinet Large in Weathered Oak. Available at Restoration Hardware
- Sconces – Sussex Shade Sconce in Chrome. Available at Pottery Barn
- Picture Frames – Weathered Oak Gallery Frames. Available at Restoration Hardware
- Vintage Hand Mirrors – Cottage Jewel Antiques
- Soap Dispensers – Threshold Oil Can Bath Coordinates. Available at Target
- Ruffled Curtain – Simply Shabby Chic Gauze Curtain Panel. Available at Target
- Toilet Paper Stand – Barclay Marvin Freestanding Toilet Paper Holder in Chrome.
- Towel Bar – Moen Madison 24in Towel Bar in Chrome. Available on Amazon
- Towel Ring – Moen Madison Towel Ring in Chrome. Available from Home Depot or Amazon

Hi Kim! you did a beautiful job! Every single detail shows and I love it. Question–can you share how you framed in the shower curtain? You removed the glass shower door enclosure but it looks like maybe you ran some type of molding across the top of the wall. Do you have a shower bar behind this? I would love to see a close-up picture and hear how you did this. Thank you for sharing all these details!
Lee
Hi Lee! You are right about the shower enclosure! It’s a simple board that runs across the ceiling between the two walls. A small piece of trim was added to the bottom of the board to make it look decorative and then everything was painted white. The shower rod runs behind the board so that it isn’t visible from the front. I don’t know exactly how the board was attached between the two walls…I just come up with the ideas and I leave it up to someone else to figure out how to execute them. Lol! But I hope that gives you enough information to understand the design.
:) Kim
I LOVE the vanity. Can you explain how you used the American Standards Retrospect sink in the project? My husband is concerned because it’s not a drop-in sink, but rather a pedestal. But I’m in love with it and nothing else will do! Thank you!
Hi Mary! I have good news and bad news for you. The good news is that my sink is actually a Retrospect drop-in sink, so it was easy to add it to the vanity. The bad news is that it doesn’t look like they make it anymore! But, I did search around for you and found this online retailer that says they still sell it. Might be worth looking into! Good luck with your project! https://bathtubsplus.com/products/american-standard-0291-008-020-retrospect-self-rimming-drop-in-bathroom-sink-in-white
Kim,
First of all thanks for sharing all your great ideas. I love how your bathroom turned out. Next, thanks for the inspiration of your vanity. Our builder one is awful and when I saw yours, I knew I wanted a statement piece like yours so I started looking. I am happy to say I finally found the perfect piece – an oak buffet – and it’s already painted! I can’t wait to get started on our bathroom and transform it. If it turns out half as good as yours, I’ll be happy! Again, thank you for inspiring me!
:-) Cecilia
PS
Can you tell me how you finished the top of your vanity?
Hi Cecilia – I’ll bet a buffet will be beautiful in the bathroom! How exciting! Since mine was already painted when I got it (like yours), I used 3 coats of Minwax Polycrylic to seal it. Be sure to seal it before you drop in the sink and fixtures so that there aren’t any gaps. I sealed the entire piece – not just the top – since the room has a lot of moisture and the kids splash water when they’re washing their hands, so you might want to consider doing the same. Good luck and be sure to send a picture when you’re done!! :) Kim
Kim,
This is a great tutorial. I wish someone had told me (shame on the handyman that didn’t!) about MDF being a no, no in bathrooms. We had a handyman install beadboard in our master bath. We will have to remove it and the base board due to warping. I’m saving this post for future reference. There are some really great ideas here, not to mention the bathroom looking fabulous!
Karen
Hi Karen – Oh no! I’m so sorry to hear! I’ll bet it was beautiful when installed. Yes, your handyman should have told you. Are you planning to replace it with a wood version? I’m hoping that my technique for the beadboard ceiling will work long-term but I’ll let you know. Actually, the shower only gets used a few times a year so I think it will be fine, but I can’t be certain.
Love the breadboard ceiling and all of the vintage touches – even in the drawers – so cute!!
xo. Leslie Segreto Finishes
Hi Leslie – Thank you!!!